The Rollbar integration for VictorOps allows you to send your Rollbar notification directly to the VictorOps timeline. Follow these easy steps to get the integration implemented.
Implementation Steps
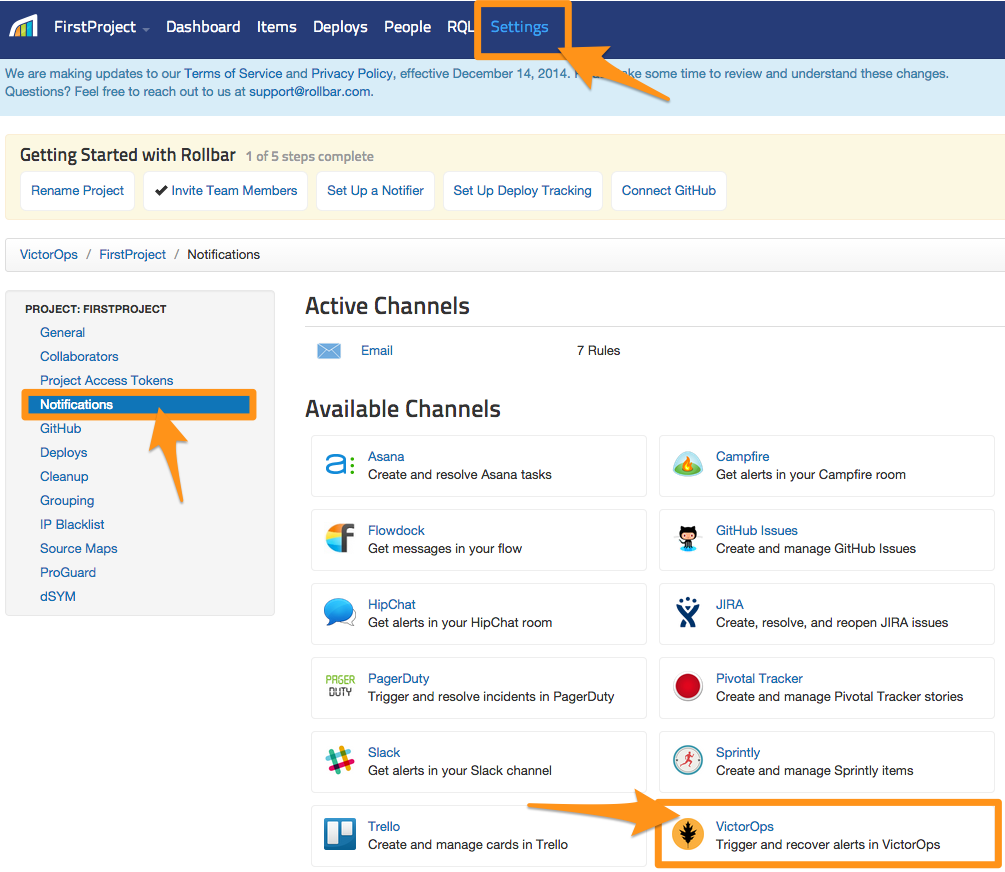
- From Rollbar, select Settings from the top of your screen, and then Notifications from the left side bar. Under Available Channels select VictorOps.
- You will then be presented with two input boxes. One for API Key and one for Routing Key, both of which can be found in the VictorOps UI. (Step 4-6)
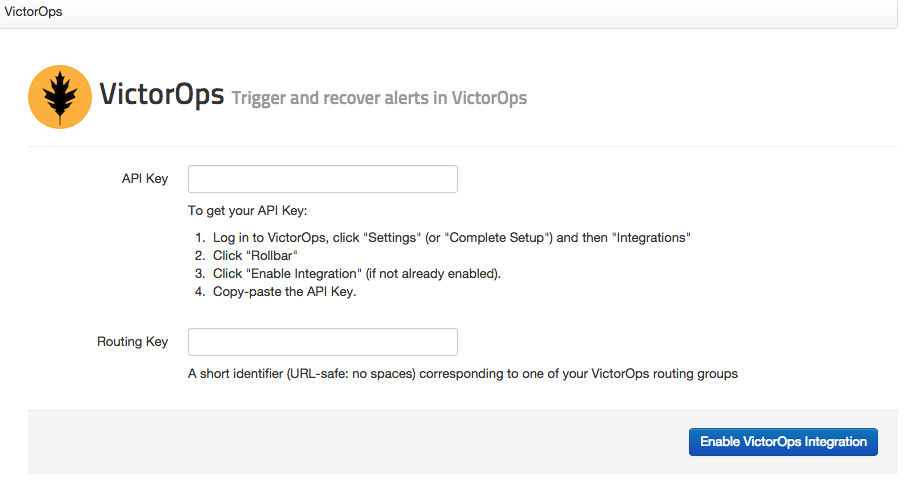
In VictorOps, select Integrations >> Rollbar. If the integration has not yet been enabled, click the “Enable Integration” button to generate your endpoint URL. Be sure to replace the “$routing_key” section with the actual routing key you intend to use.
Resolve via VictorOps
This feature requires the Full-Stack features set in order to access Outgoing Webhooks.
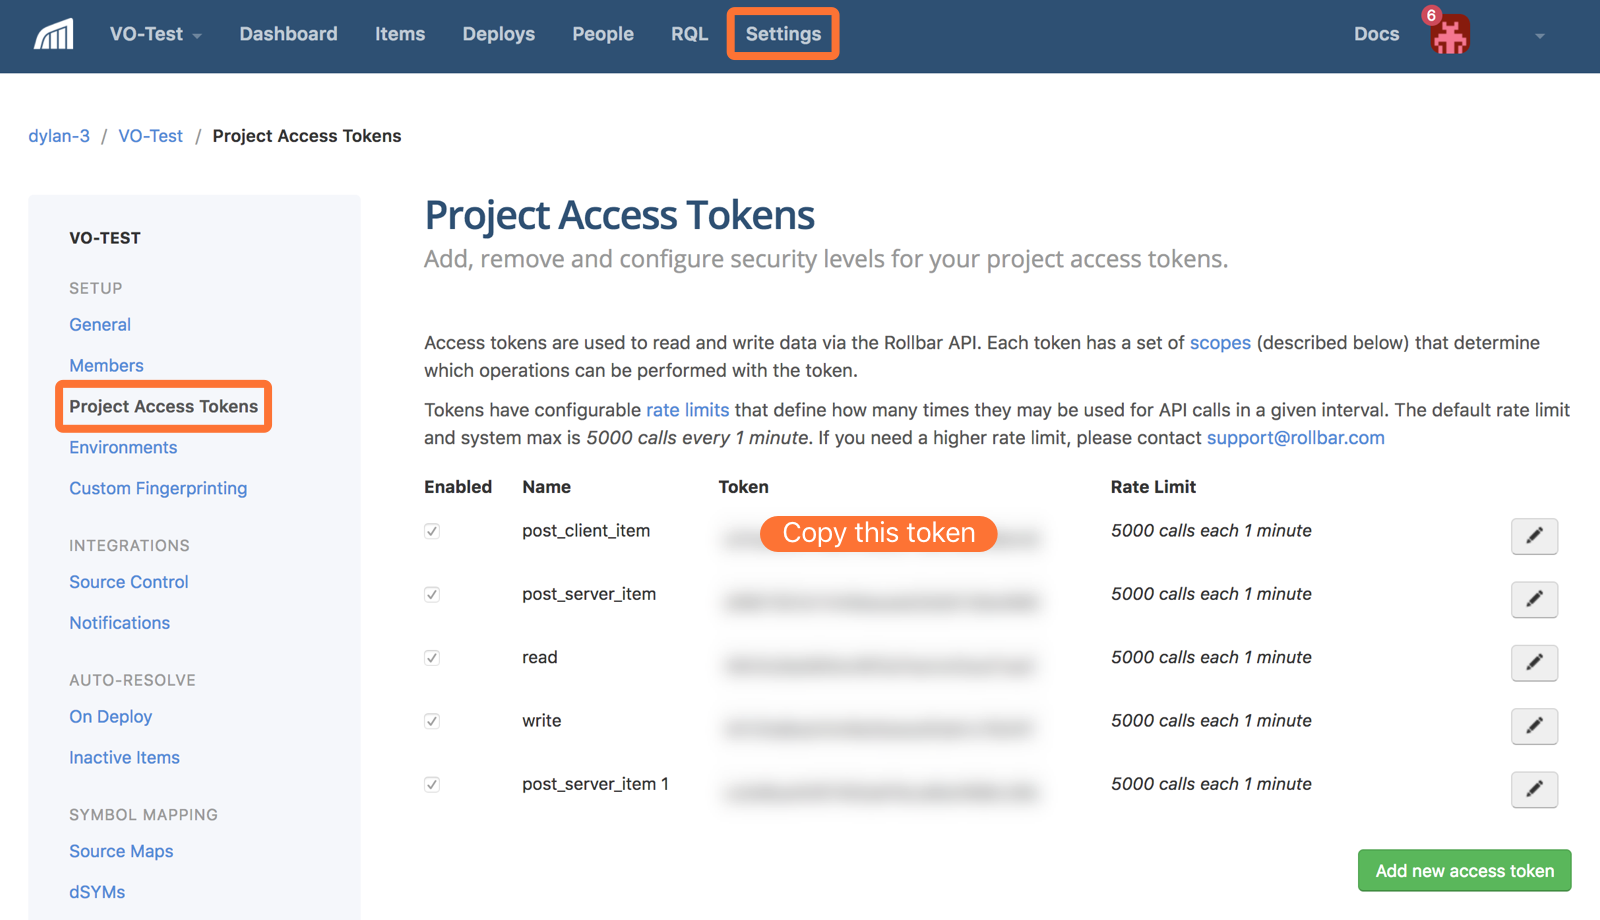
If desired, recoveries in VictorOps can be passed to Rollbar as a resolve. To do this, an access token from Rollbar will be needed to leverage the api. This token can be found under Settings >> Project Access Tokens, copy the value of the post_client_item.
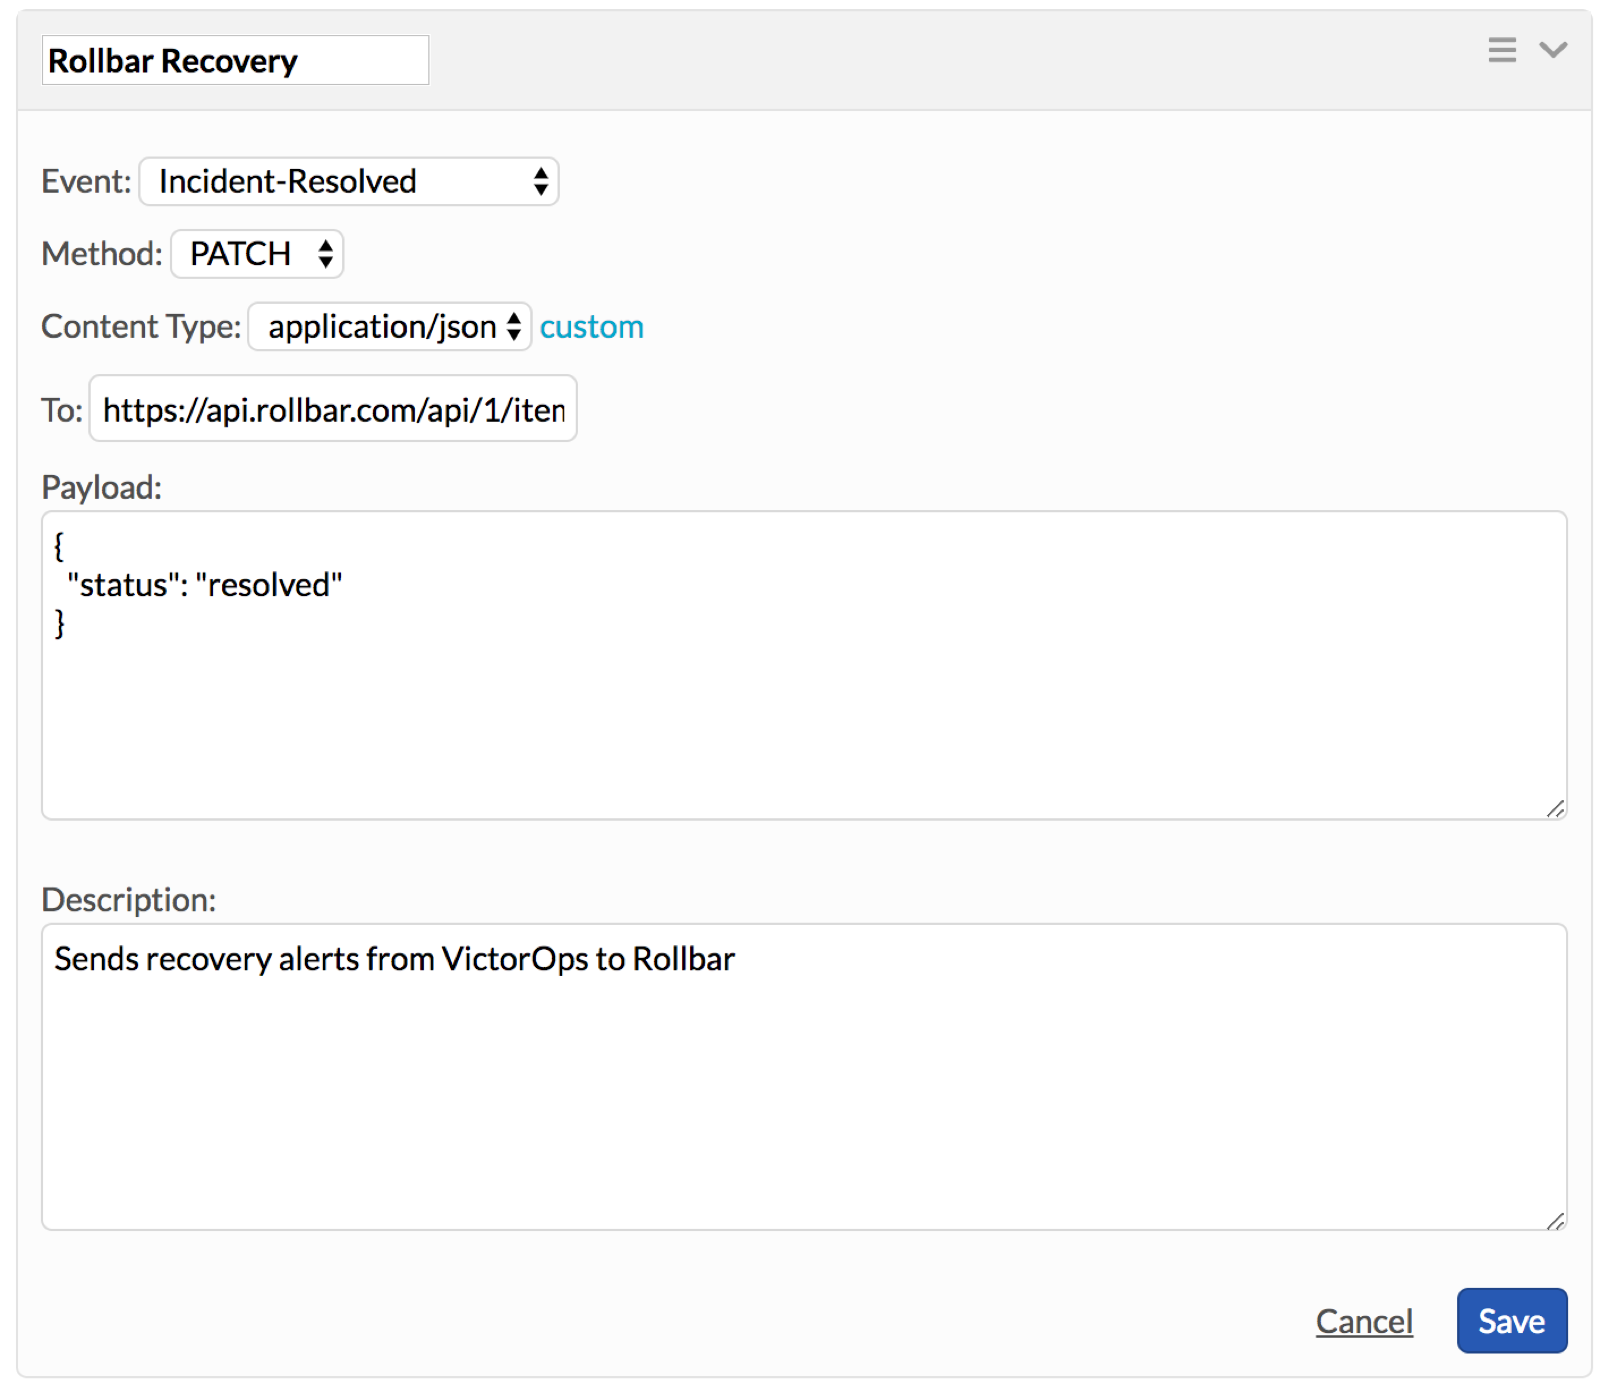
In VictorOps, navigate to Integrations >> Outgoing Webhooks, and select Add Webhook. Use the following values for your configuration and be sure to replace the access token with value copied from Rollbar.
- Action: Incident-Resolved
- Method: PATCH
- Content-Type: application/json
- To: https://api.rollbar.com/api/1/item/${{ALERT.rollbar_item_id}}?access_token=YOUR_ACCESS_TOKEN_HERE
- Payload: {“status”:”resolved”}
In the end, your webhook should look like the below screenshot.